Processingで表現する例をいくつか掲載します。
- データ・変数
- 図形の描画
- 色の指定
- 点と直線の描画
- 円と円弧の描画
- 四角形と三角形の描画
- 多角形の描画
- 曲線の描画
- 繰り返し
- 条件分岐
- 関数
- アニメーション
- イベント動作
- 画像
- 配列
- オブジェクト指向プログラミング
- 数理造形
- やってみよう
これまでに説明した内容を使って、できるところからいろいろなコードを書いてみましょう。
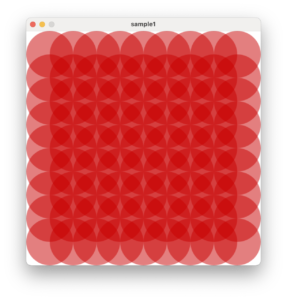
整列した図形
次のコードは横9x縦9個の円を透明度を含めて重なるように描画しています。
void setup() {
  size(500,500);
  noLoop();
}
void draw() {
  background(255);
  noStroke();
  fill(200,0,0,128);
  for (int y=0; y<9; y++) {
    for (int x=0; x<9; x++) {
      ellipse(50+width/10*x,50+height/10*y,100,100);
    }
  }
}
少し修正して特定の円の色と透明度を変更し青を強調してみます。
void setup() {
  size(500,500);
  noLoop();
}
void draw() {
  background(255);
  noStroke();
  for (int y=0; y<9; y++) {
    for (int x=0; x<9; x++) {
      if ((x+y)%2==0) fill(0,0,200,128);
      else fill(200,0,0,70);
      ellipse(50+width/10*x,50+height/10*y,100,100);
    }
  }
}
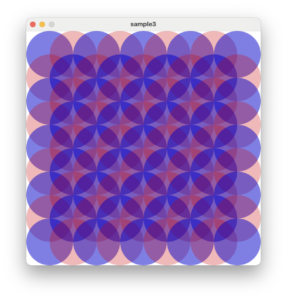
さらに、青の図形を変えてみます。
void setup() {
  size(500,500);
  noLoop();
}
void draw() {
  background(255);
  noStroke();
  rectMode(CENTER);
  for (int y=0; y<9; y++) {
    for (int x=0; x<9; x++) {
      if ((x+y)%2==0) {
        fill(0,0,200,128);
        rect(50+width/10*x,50+height/10*y,80,80);
      } else {
        fill(200,0,0,70);
        ellipse(50+width/10*x,50+height/10*y,100,100);
      }
    }
  }
}
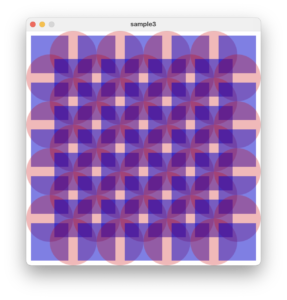
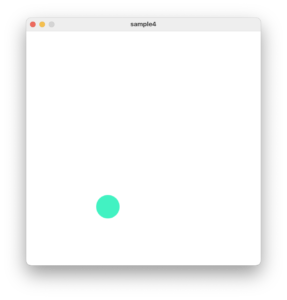
図形を動かす
図形を動かす作品を書いてみましょう。次のコードは画面を円がうろうろと動きます。
float x,y;
int s;
int dx=4,dy=5;
color c;
void setup() {
  size(500,500);
  x = width/2;
  y = height/2;
  s = 50;
  c = color(random(255),random(255),random(255));
}
void draw() {
  background(255);
  noStroke();
  fill(c);
  ellipse(x,y,50,50);
  x += dx;
  y += dy;
  if (x<s/2 || x>width-s/2) dx *= -1;
  if (y<s/2 || y>width-s/2) dy *= -1;
}
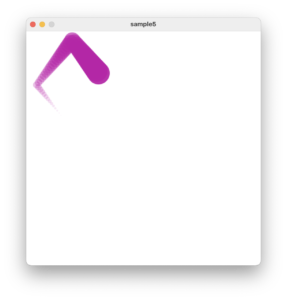
このコードを少し修正して複数個の円が連なって動作するようにします。
連なる円はだんだんと小さく、そして透明になっていきます。
float[] x;
float[] y;
int s;
int dx=4,dy=5;
color c;
void setup() {
  size(500,500);
  s = 50;
  x = new float[s];
  y = new float[s];
  x[49] = width/2;
  y[49] = height/2;
  c = color(random(255),random(255),random(255));
}
void draw() {
  background(255);
  noStroke();
  for (int i=0; i<s-1; i++) {
    x[i] = x[i+1];
    y[i] = y[i+1];
  }
  x[49] += dx;
  y[49] += dy;
  if (x[49]<s/2 || x[49]>width-s/2) dx *= -1;
  if (y[49]<s/2 || y[49]>width-s/2) dy *= -1;
  for (int i=0; i<s-1; i++) {
    fill(c,i*5);
    ellipse(x[i],y[i],i,i);
  }
}
これをベースにいろいろと修正してみましょう。円の大きさを変えたり、連なる間隔を変えたりなどなどです。
また、画面端で跳ね返る動作は座標移動量の値の符号を変えてる(正負を切り替えている)だけなので、同じルートを繰り返し通ります。
少し工夫してランダムに跳ね返るようにしてみましょう。例えば、跳ね返るときにdx,dy変数の値を符号に応じて値をランダムに設定するなどです。(正のときは2~5のどれか、負のときは-5~-2のどれかなど)
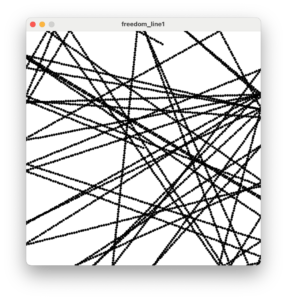
ランダムウォーク
三角関数を使って円を移動させたり、ランダムに跳ね返らせることもできます。
それでは三角関数を使って図形を移動させる座標を算出し、そこに点を描画することで移動した軌跡を描くコードを書いてみましょう。
端に着いて跳ね返るときはランダムにします。
int angle=0;
float radius=1;
float cx,cy;
void setup() {
  size(500,500);
  background(255);
  angle = int(random(360));
  cx = width/2;
  cy = height/2;
}

void draw() {
  float x = cx + radius * cos(angle*PI/180);
  float y = cy + radius * sin(angle*PI/180);
  strokeWeight(5);
  point(x,y);
  if (x<0 || x>width || y<0 || y>height) {
    radius=1;
    cx = x;
    cy = y;
  }
  else radius+=5;
  if (x<0) angle = int(random(-90,90));
  if (x>width) angle = int(random(90,270));
  if (y<0) angle = int(random(0,180));
  if (y>height) angle = int(random(180,360));
}
1行目のangle変数は点を描画していく(図形を移動させる)角度を格納します。
2行目のradius変数は座標を算出するための半径を格納します。初期値は1で座標が端を超えるまで1ずつ変化していきます。
3行目のcx,cy変数は変化していく座標(移動する座標)の起点となる座標を格納します。
cx,cyを起点に半径(radius)と角度(angle)をもとに座標を算出します。
半径(radius)が1ずつ変化していくので、その円周上の座標が大きくなり、図形が移動していきます。
4行目のsetup()内でangle,cx,cyに初期値を設定します。
angle変数には0以上360未満のどれかの整数(角度)、cx,cyには画面中央の座標を設定します。
17〜22行目で算出した座標が画面端を超えてたら、radius変数を1、そのときのx,yをcx,cyに格納し、次の座標算出の起点とします。
超えてなければ、radius変数を5ずつ変えて座標をそのときの角度(angle)に向けて変化させます。
23〜26行目は座標が画面左端を超えたときは角度を-90~90のどれかにし、右端を超えたときは角度を90~270のどれかにし、上端を超えたときは角度を0~180のどれかにし、下端しを超えたときは角度を180~360のどれかにすることでランダムに跳ね返るようにしています。
これを少し修正し跳ね返るたびにランダムに色を変えるようにします。
その色で表示するときはランダムに透明度を変えます。
int angle=0;
float radius=1;
float cx,cy;
color iro;
void setup() {
  size(500,500);
  background(255);
  angle = int(random(360));
  cx = width/2;
  cy = height/2;
  iro = color(random(200),random(200),random(200));
}

void draw() {
  float x = cx + radius * cos(angle*PI/180);
  float y = cy + radius * sin(angle*PI/180);
  strokeWeight(5);
  stroke(iro,random(100,255));
  point(x,y);
  if (x<0 || x>width || y<0 || y>height) {
    radius=1;
    cx = x;
    cy = y;
    iro = color(random(200),random(200),random(200));
  }
  else radius+=5;
  if (x<0) angle = int(random(-90,90));
  if (x>width) angle = int(random(90,270));
  if (y<0) angle = int(random(0,180));
  if (y>height) angle = int(random(180,360));
}
4行目のiro変数は色情報を格納します。setup()内で初期値としてランダムに色を決めています。
18行目で点の色を設定しています。そのときランダムに透明度を変えています。
24行目で座標が画面端を超えたら色をランダムに作成しています。
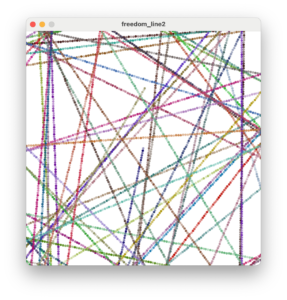
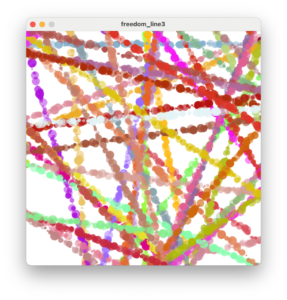
これをさらに修正し、点を描くときに座標を少しずらせて大きさもランダムに変えるようにします。
int angle=0;
float radius=1;
float cx,cy;
color iro;
void setup() {
  size(500,500);
  background(255);
  angle = int(random(360));
  cx = width/2;
  cy = height/2;
  iro = color(random(128,255),random(255),random(255));
}

void draw() {
  float x = cx + radius * cos(angle*PI/180);
  float y = cy + radius * sin(angle*PI/180);
  x += random(-3,3);
  y += random(-3,3);
  strokeWeight(int(random(2,20)));
  stroke(iro,random(100,255));
  point(x,y);
  if (x<0 || x>width || y<0 || y>height) {
    radius=1;
    cx = x;
    cy = y;
    iro = color(random(128,255),random(255),random(255));
  }
  else radius+=5;
  if (x<0) angle = int(random(-90,90));
  if (x>width) angle = int(random(90,270));
  if (y<0) angle = int(random(0,180));
  if (y>height) angle = int(random(180,360));
}
17〜18行目で算出した座標から少し座標をずらせます。
19行目で大きさをランダムに変えます。
そして、11、26行目で色を決めるときに少し赤成分を残すようにしています。